There has been a great deal of activity around the homestead in the past several weeks, so I thought I should update as many as possible in this latest entry. With the weather finally getting back to what we normally expect for April, it was easier getting outside and getting projects moving.
HATCHED CHICKS
The chick are now 4 weeks old and don’t really look like chicks anymore. We are starting to see specific characteristics that are helping me determine who my roosters are. It appears that I may have 7 or 8 out of the 19 the hatched. Within the next two weeks they will be moved to the chicken tractor outside so the brooder can be made ready for our next batch coming out of the incubator.
One interesting note: I purchased five watering nipples to try in the brooder. I was very hopeful that the nipples would allow me to maintain a close system waterer and not get contaminated so quickly by the chicks. They can really kick up the saw dust.
My test setup up was to take a two liter bottle and just attach the nipple through the lid. The issue I ran into was the closed two liter created a vacuum and would not deliver water. A friend of mine, Matt, suggested a drill a hole in the top of the bottle (bottom opposite the lid) to see if it would produce water. I drilled a small 3/8 hole. That worked perfectly. As I build the larger system for the main coop, I now know to not make it so air tight.
INCUBATOR CHICKS
On Saturday, April 6th, I placed 126 eggs into the incubator for the next batch. My goal is to get 40 to 50 good laying hens. The roosters and left over hens will probably end up as fryers. On day 9, I candled all 126 and found 20 that were not fertilized. That leaves me 106 to take to the home stretch. I am not sure where I will keep all of these if they hatch out, but I am anxious to see how they do.
It is interesting to note that the first batch of 27 have 5 unfertilized eggs which is about 18%. The 20 of the 126 unfertilized in batch number 2 is 16%. I was under the impression that number would be higher. I guess Adam’s roosters are much more vigilant than expected.
NEW COOP
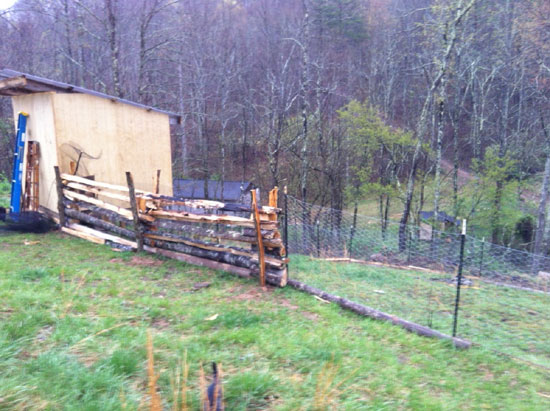
The new coop is now ready and has the 11 Rhode Island Reds now living in it. The coop is designed to have two different pop doors that allow the chickens into two different pastures that are approximately 1800 square feet each. I have creatively dubbed the two pastures as pasture A and pasture B. Pasture B has better grass right now and is the only pasture open to the chickens at this time. Pasture A is recently cleared wooded area and is just now starting to grass in.
The new coop has a fancy gate latch for the door that I purchased on close out at Lowes 8 years ago. I thought this would be the perfect place to use it. It has a spring-loaded latch that quickly and easily latches the door via a metal cross bar. The one problem I discovered after installing it was there is no way to release the latch from the inside. So imagine my chagrin as I test the door latching from the inside and realize I am now stuck in the coop. I had not cut the pop doors at that time so I was literally a prisoner in the coop. Fortunately, my father was working with me and a simple cry for help freed me, but not with a good dose of ribbing.
I now had to come up with a way of opening the coop from the inside. My youngest and I spent the evening in the woodshop developing a latch release mechanism that appears to work quite well so far.
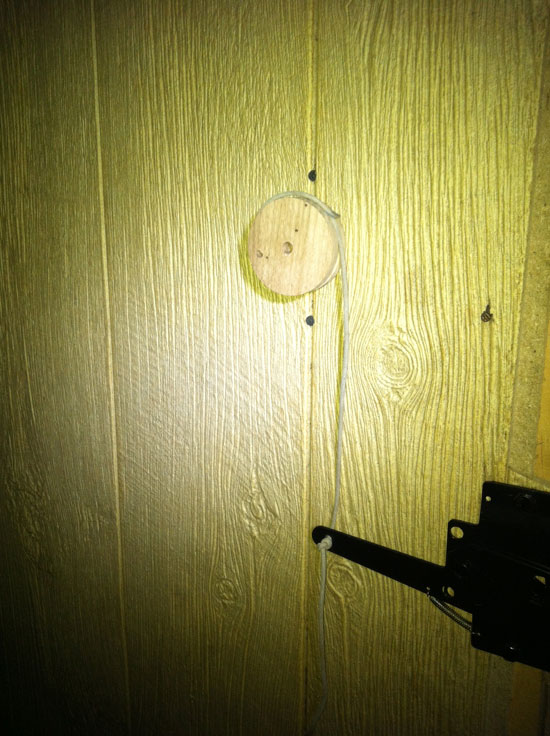
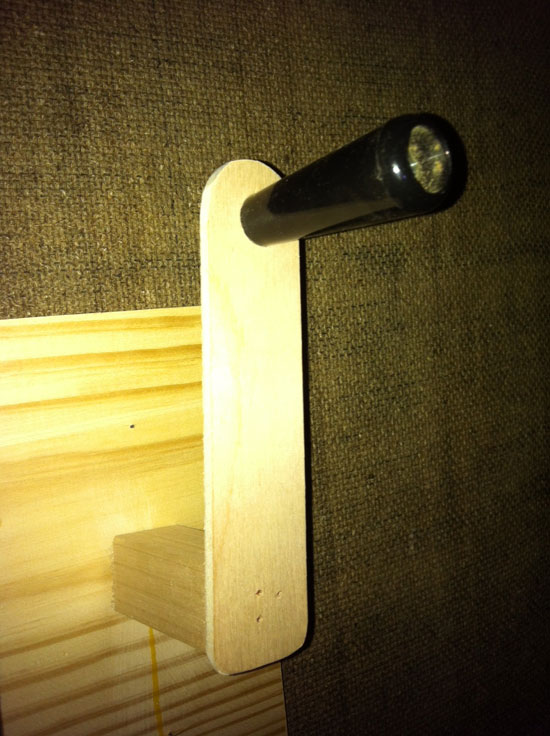
To release the latch on the outside, a small lever must be lifted up. I drilled a hole in the end of the lever to accept a heavy cord. I then made a round wheel out of oak and routed a groove around it much like a pulley. I glued a dowel rod to the center as an axle that penetrates the wall of the coop. On the inside, a small handle was attached to the axle. I fixed a cord to the wheel and tied it tight to the latch lever. With a 90 degree turn of the handle inside the coop, the wheel turns counter clockwise and draws the cord around the wheel thus pulling the lever up and releasing the latch. Now I just have to test the device’s longevity.
POTATOES PLANTED
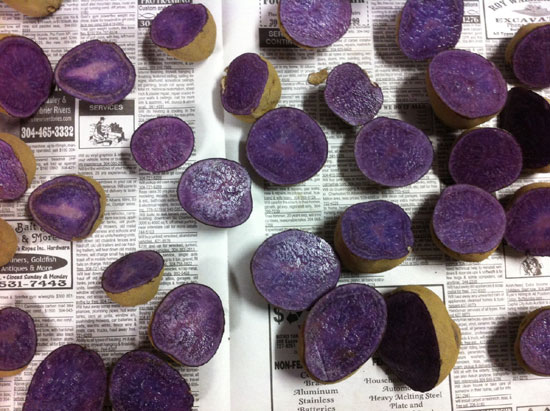
We were finally able to plant our potatoes in our raised beds since the weather was finally agreeable. We decided to test the vertical potato planting method this year and plant the alien-looking Adirondack Blue potatoes. These things look like something from Star Trek.
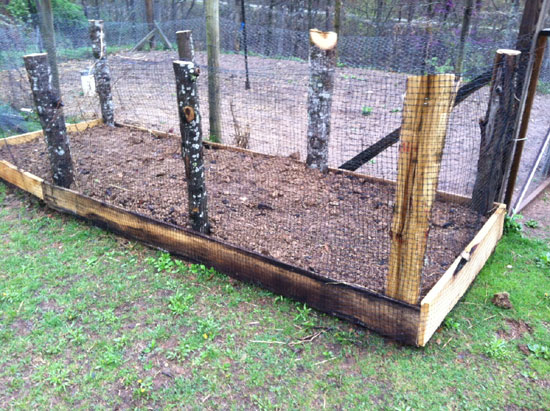
I created an area 12ft long by 3ft wide and set 8 wooden fence post made from split poplar logs. I set the posts in the ground to form a perimeter around the area. To the posts, I nailed pine boards that were 10 inches wide. I then backfilled the container with a mixture of quality soil and last year’s leaves. This gave me 10 inches of soil to plant the potatoes.
As the plants grow, I will continue to add boards to the sides to build up the container walls and add more dirt. I will cover all but the very top of the potato plant. This should promote more potato growth in the new dirt layer. I will continue to add more dirt throughout the season as the plants growth with the objective of being up to four feet tall by the end of the season. This should produce a dramatic increase in potatoes in a relatively small space.



[…] exit, a simple pull of the lever would release the lock on the outside. This is all detailed in my farm update post from April. The latch had worked flawlessly for over a month and was recorded in my mind as one of my small […]